d2jsp
Log InRegister
d2jsp Forums > Off-Topic > Sports Coliseum > Motor Sports & Cars > I've Been Shaving My Manifold > Picture Content
Prev13435363738136Next
Add Reply New Topic New Poll
Member
Posts: 21,519
Joined: Feb 7 2007
Gold: 14.75
Aug 15 2013 06:05pm
Quote (OldAndyAndTheSea @ Aug 15 2013 07:57pm)
First set of new goodies arrived.

Wheels are ordered, but not expected for 6 weeks...

http://i524.photobucket.com/albums/cc327/twofortyz/rotahyper_zps0c48b56d.jpg

Tires arrived today.

My birthday is tomorrow, and one kind soul decided to purchase black couplers for me, so those are in the mail! Stoked.

Spent the last week or so, finally not working/racing full time, fixing leaks in my thermostat housing. I finally think that I figured that out.

Next is to track down which of my injectors is leaking, and wait for my replacements.

Then back to configuring megasquirt. I know.....slow progress is slow.....You know how it is, life and stuff. Hopefully I can make some more progress before I go to school in Rhode Island come September.

Here's a couple of shotty pictures, teasing the new sneakers.

Yokohama S-Drives

275/40r/17 in the rear
245/40r/17 in the front

Definitely the poke I was looking for. My wheels cant come quick enough.

http://i524.photobucket.com/albums/cc327/twofortyz/photobucket-40694-1376610354782_zpsb4323f2c.jpg

http://i524.photobucket.com/albums/cc327/twofortyz/photobucket-45445-1376600671652_zps1393d410.jpg


Real rs wats? I'm suprised the wait is only 6 weeks lol.
Member
Posts: 12,628
Joined: Oct 7 2008
Gold: 10.00
Aug 27 2013 08:30am
With my school departure date of September 1st looming it's ugly head, and while I made sure of my living arrangements in Rhode island, progress on the car has suffered. And I apologize. No one wants me to work on it more than I do.

I've only managed to fix a couple miscellaneous wiring quirks on the car, and I may have solved my last remaining electrical issue, in regards to megasquirt. Fingers crossed. But I won't know until I solve my last two remaining mechanical issues.

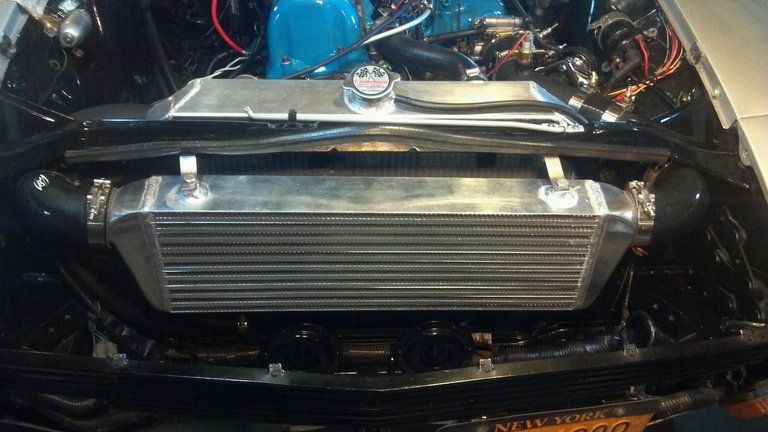
My third attempt of drilling and tapping the random 40 year old cast aluminum thermostat housings around my garage has proven to be quite the project....And somehow along the way I have managed to destroy my Optima Red top...Balls......

So my "make it run" list is as follows:

-Fix leaking thermostat housing (by making a new one)
-Find/fix source of dropping fuel pressure, after I turn the key off. (injectors check out, and I've swapped in two different fuel pressure regulators to see if that was the culprit; no change, unless BOTH were bad, which I guess is possible)
-Retime motor
-Reinstall distributor

Then......Check for correct RPM signal in Tunerstudio under cranking.

If that checks out. Hallelujah, I get to attempt to fire the motor. If not. Back to troubleshooting.

But all of that said, progress will soon slow once again, lets see how much I can get done in the meantime.


oh...Also.....Black couplers baby... :)


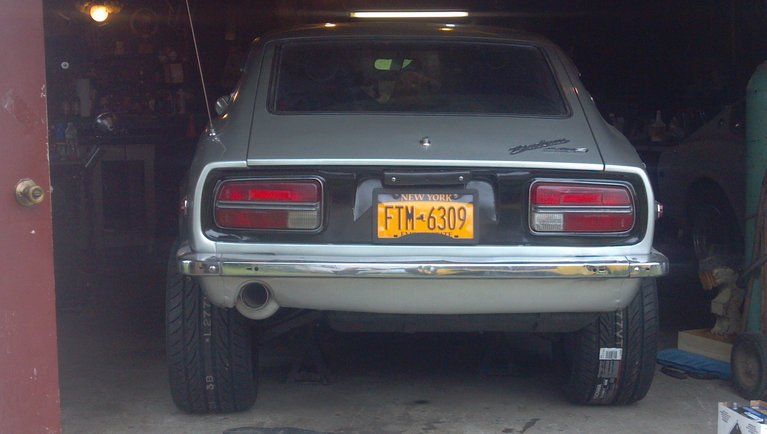
I'll tell you what... With the new couplers, and the tires just sitting under the car on JACK STANDS, it's definitely starting to look really mean. And starting to show a personality. Definitely excited. I can't wait til I can actually see the tires tucked into the fender flares.

I figure if it looks AT ALL decent like this. Its going to look pretty darn good when it's actually sitting on mounted wheels/tires. It's hard to get a justified picture, but here's a small idea. I LOVE how it is going to look with my exhaust.


Member
Posts: 14,878
Joined: Jan 11 2007
Gold: 46.00
Aug 27 2013 10:21am
Coming together nice..
Member
Posts: 8,300
Joined: Jul 27 2008
Gold: 880.66
Aug 27 2013 12:48pm
excellent thread and project, owned a few s13's myself a few years back

one slightly off-topic question

Are you using a 3 wire alternator? And have you tested that you have the correct resistor installed?

Only reason i ask is I'm actually planning on wiring up a gm 3 wire alternator here shortly and have been looking all over for experience using the correct resistor and want to make sure I get the right one.
Member
Posts: 2,388
Joined: Nov 26 2006
Gold: 23.40
Aug 27 2013 05:01pm
Wow I'm so glad I took the time to go through all 36 pages. This is quite the project. Looking really sharp and clean!
Member
Posts: 22,297
Joined: Jul 3 2009
Gold: 15.00
Aug 27 2013 05:20pm
Hurry up andy I want a video of this bitch on the street already!
Member
Posts: 11,565
Joined: Jan 13 2008
Gold: 224.25
Aug 27 2013 05:35pm
september 1st? thats comming real fast, how bad is that thermostat housing?
Member
Posts: 12,628
Joined: Oct 7 2008
Gold: 10.00
Oct 15 2013 04:27pm
Updating this thread since it's been FOREVER.

Despite me working on the new Datsun a lot, I AM IN FACT still working on this car.

To bring it up to date.

- Still currently waiting on the wheels, (it's been 8 weeks, I expect them any time now)

- Still need to tap my new thermostat housing (once again...haha)

- And here in Bristol I am working on making a set of carbon fiber doors, and door panels. So as that happens, I will update accordingly. That's going to be real exciting.


But until then, I'll be focusing on the rusty POS 280zx to get that to daily driving condition. But I imagine once my wheels arrive that will certainly light a fire under me to get the rest of this car done.

Sorry for the delays, work is still in progress!

This post was edited by OldAndyAndTheSea on Oct 15 2013 04:28pm
Member
Posts: 12,628
Joined: Oct 7 2008
Gold: 10.00
Dec 8 2013 04:34pm
Again, sorry about the lack of updates. It's definitely killing me not being able to work on the car. Especially since this one is so damn close to ignition..

Well..... Still waiting on wheels, and still splitting my time between New York, and Rhode Island.

While I'm in RI, I get to play with composites, so as a spare time project I've been making a new horn button.

I know....nothing spectacular, but it's all I can do from a few states away. Figure I'd share my progress to date, nonetheless.


The OEM horn button is a serious offender in my opinion. It's comically large, and they only get bigger with the later 260 and 280 horns. I feel it is the weakest link in my interior.

Here's an older shot showing the OEM button.


I've always liked the look and feel of the stock wheel, so I made a plan and got to work...


Started by dissecting the OEM horn pad. I removed a plastic insert, which allowed the button to fit snugly on the wheel.


After fixing a couple of cracks, I cut a cap out of some 22 gauge sheet metal. Epoxied them together, and began making the surface fair, by sanding..

Pre sand


Member
Posts: 12,628
Joined: Oct 7 2008
Gold: 10.00
Dec 8 2013 04:35pm
Once I had the shape I wanted, the part was ready to have carbon fiber applied.

And since I was worried about a cosmetic finish on the face of the part, infusion was my technique of choice.

Dry 12k Carbon twill was placed in a vacuum bag, and the part was infused using a low viscosity resin.

Here it is first, under vacuum.


Then after resin has been pulled through the laminate, you can see the dark carbon becomes visible once saturated, even under a couple of layers of other materials.


Go Back To Motor Sports & Cars Topic List
Prev13435363738136Next
Add Reply New Topic New Poll