d2jsp
Log InRegister
d2jsp Forums > Off-Topic > Sports Coliseum > Motor Sports & Cars > My $650 Budget Datsun Build > Datsun S130
Prev1121314151631Next
Add Reply New Topic New Poll
Member
Posts: 12,628
Joined: Oct 7 2008
Gold: 10.00
Mar 22 2014 05:51am
Quote (MyGodIsTheSun @ Mar 22 2014 05:57am)
http://www.reactionface.info/sites/default/files/images/YvEN9.png

Who...when.... How did you figure that one out? It makes perfect sense and all...but I never woulda put it together. I woulda just stripped it out of there and put some donor carpet or something down....


Haha. I have a friend who fixes interiors. He goes around to all the local dealerships and fixes all the little tears ( some huge too) and burn holes and stuff. This is how a lot of those "certified pre owned" vehicles are refreshed.

Donor carpet costs money, haha. And I wanted it to at least match the passengers side. Luckily I can make templates of both carpet pieces and use them to make my own carpet kit, should I care to.

This is fun.
Member
Posts: 16,769
Joined: Jun 21 2007
Gold: 21,296.22
Mar 22 2014 10:03am
Quote (MyGodIsTheSun @ Mar 22 2014 05:57am)
http://www.reactionface.info/sites/default/files/images/YvEN9.png

Who...when.... How did you figure that one out? It makes perfect sense and all...but I never woulda put it together. I woulda just stripped it out of there and put some donor carpet or something down....


I learned this trick probably 15 years ago watching one of those car shows I watched every Saturday, I think maybe it was 2 guys garage, or maybe Shade tree mechanic...I don't remember, but the method is fairly common practice.
Member
Posts: 12,628
Joined: Oct 7 2008
Gold: 10.00
Mar 22 2014 08:42pm

Patch-Fest 2014 has officially come to an end!

The car is as closed up, and strong, as I care to make it.

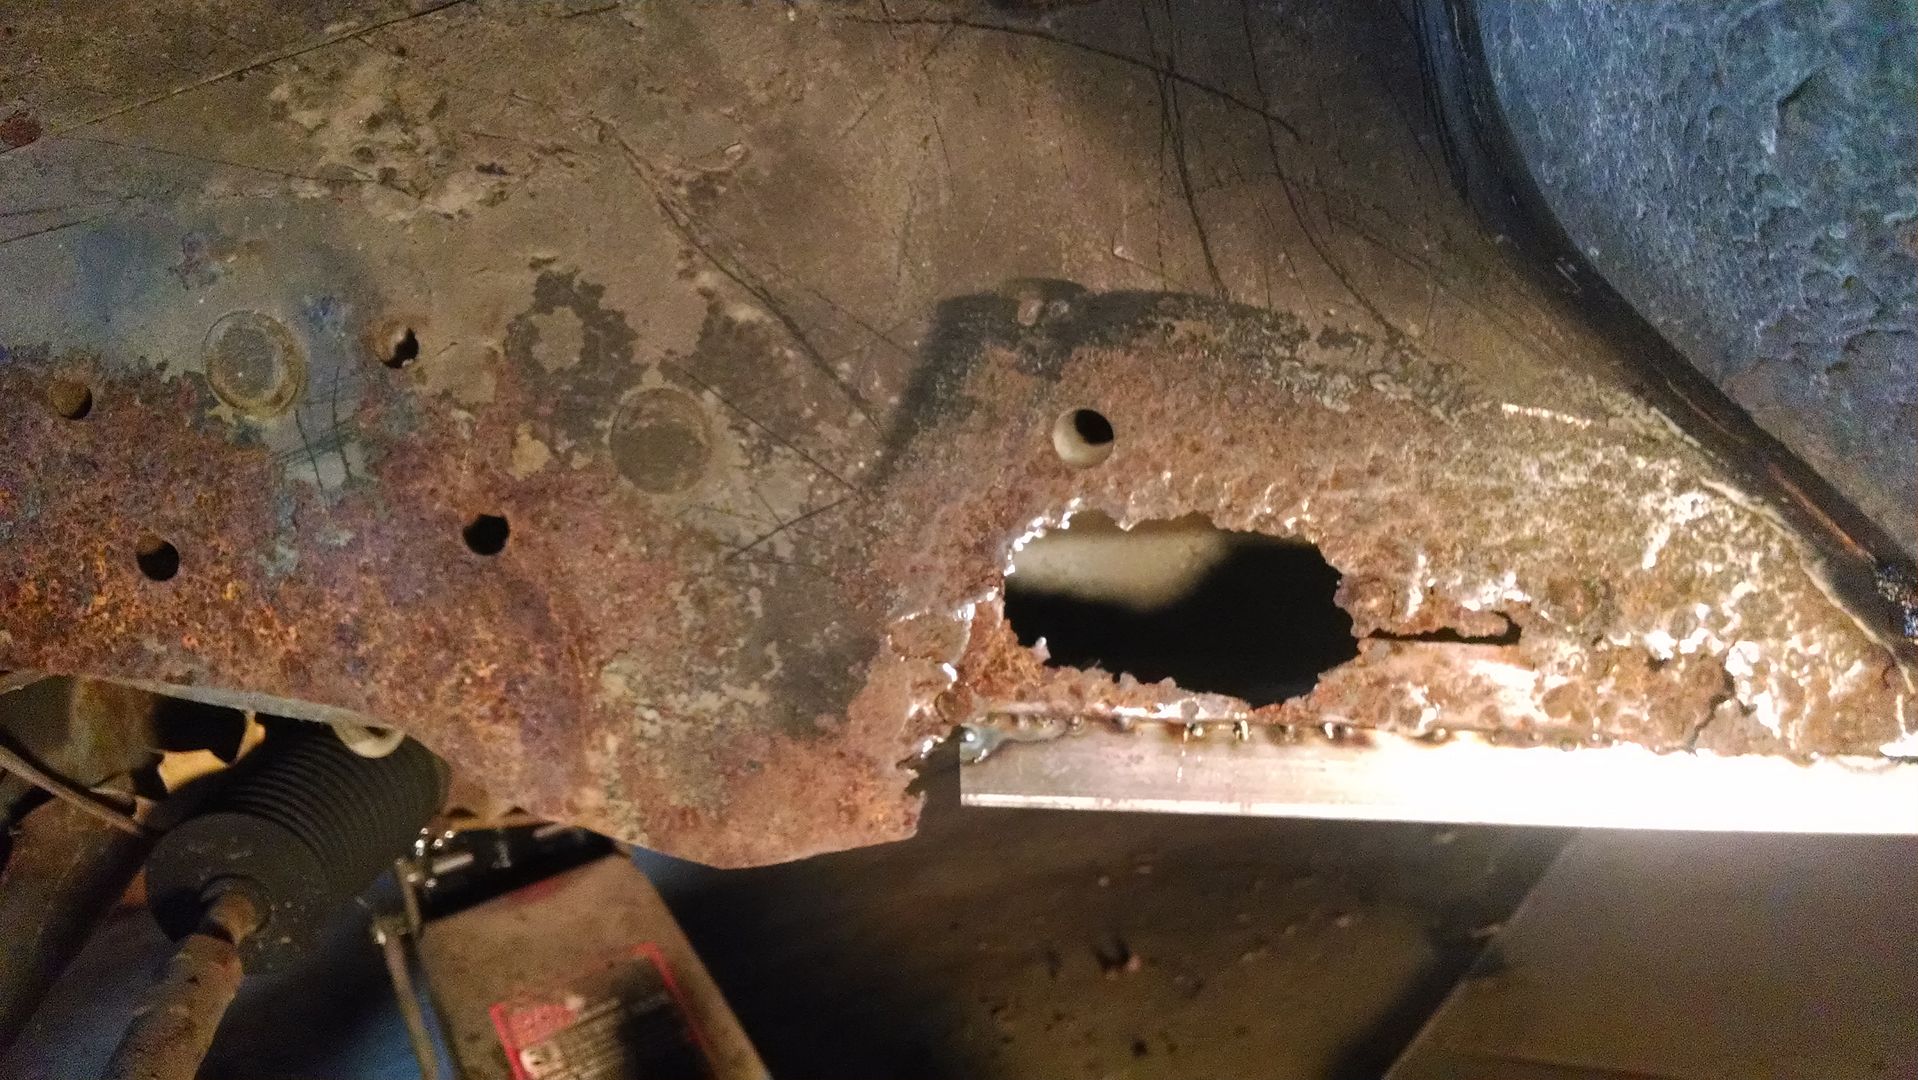
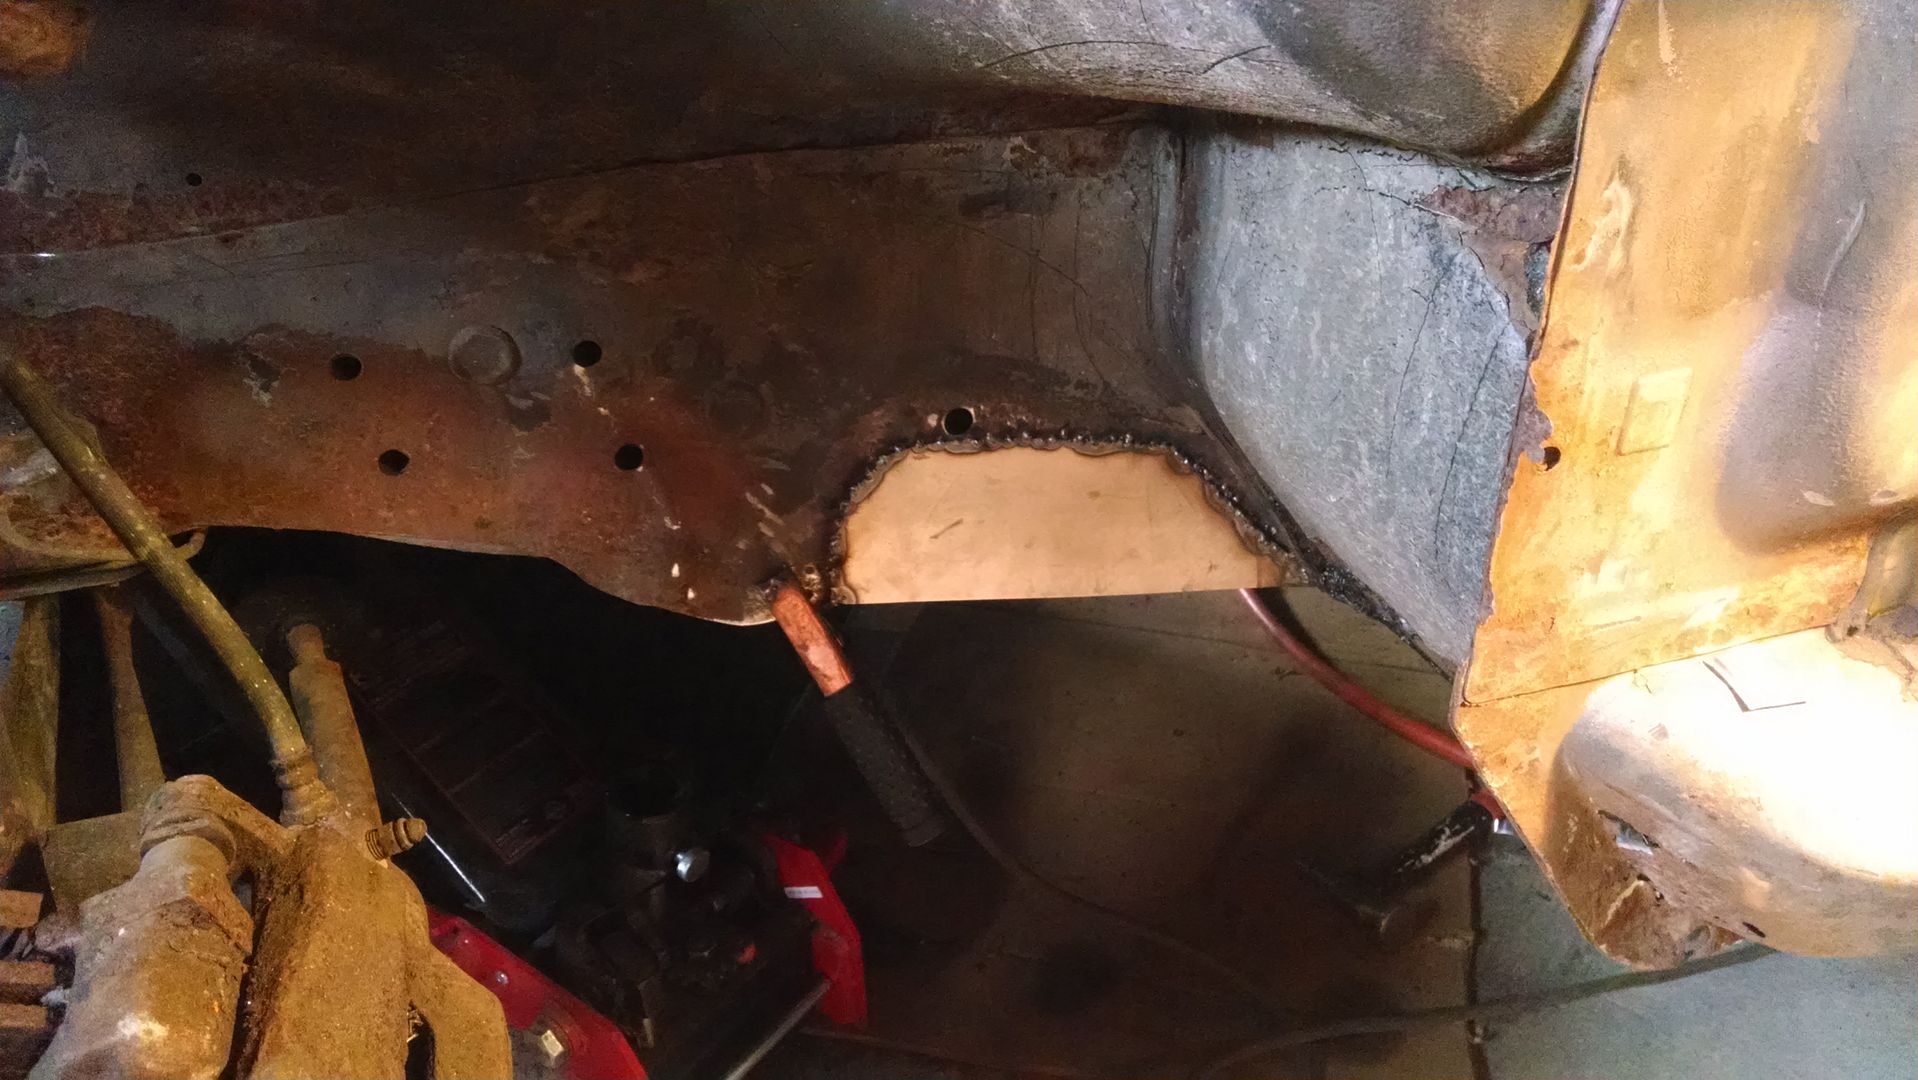
Here's what I got done today:


-Finished welding, painted, and seam sealed the driver's wheel well.

-Some more random body work

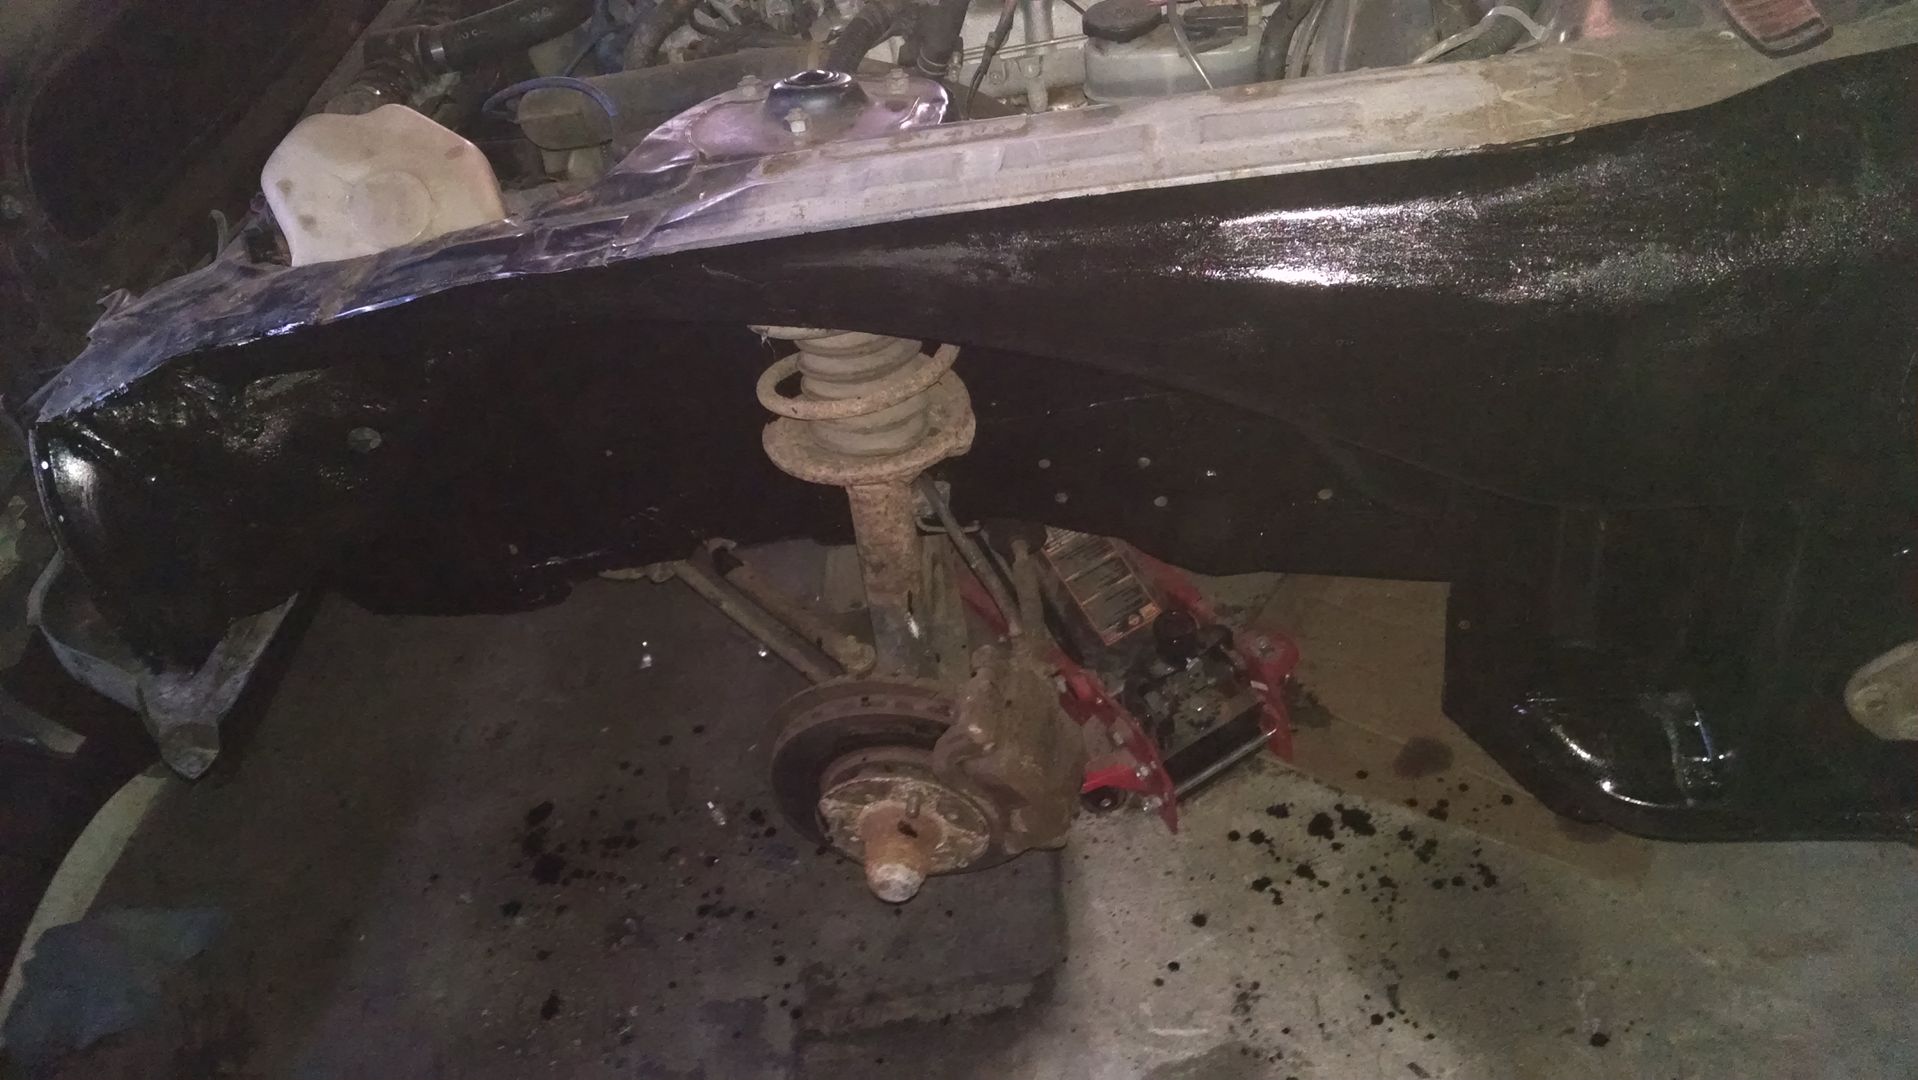
-Driver's interior mocked back in place (mainly so I could just sit in it, play with my new floors a bit, haha)

-Fender placed back on the car. Some teaser shots for myself. And the car now. Same angle as always.


Member
Posts: 12,628
Joined: Oct 7 2008
Gold: 10.00
Mar 22 2014 08:43pm


Member
Posts: 12,628
Joined: Oct 7 2008
Gold: 10.00
Mar 22 2014 08:43pm


Tomorrow, after some errands, I will begin cutting the exhaust, and once again start working the body....... FINALLY!

Days worked on project to date: 25

Total money spent on project to date: $800
Member
Posts: 12,628
Joined: Oct 7 2008
Gold: 10.00
Mar 23 2014 05:28pm
Exhaust!!!!

Okay so here's the layout.

Downpipe ---> 2.5"-3" adapter ---> 3" pipe --> Dynomax straight through muffler


The geometry of the bends is actually pretty complex. So that's where I started. The pipe not only bends, but also twists as it has to be routed over top of the rear end, and subsequent cross members. Hopefully the pictures do better explaining.

I will also have to make this a 2 or a 3 piece exhaust due to those bends. So I'll have to either make, or source out some 3"-3" ID couplers.


I'll say this though......It's really nice doing some clean fabrication work. Such a relaxing change from rusty garbage repair. I'm having a ton of fun building this.

Here's what I've accomplished so far.


This post was edited by OldAndyAndTheSea on Mar 23 2014 05:28pm
Member
Posts: 12,628
Joined: Oct 7 2008
Gold: 10.00
Mar 23 2014 05:29pm


Member
Posts: 12,628
Joined: Oct 7 2008
Gold: 10.00
Mar 23 2014 05:29pm
First section.


Coupler will go here.


All bendy twisty over rear end suspension stuff.


I'm all fueled up with some potato leek soup.

It's time for round two. More tonight...
Member
Posts: 12,628
Joined: Oct 7 2008
Gold: 10.00
Mar 23 2014 08:08pm
I have pretty much finished the first half of the exhaust. Tomorrow I start the second half.

Luckily I am able to make the exhaust a 2 piece, instead of my original 3 piece thinking. So instead of a coupler, where I mentioned before, I was able to butt them together instead. Much easier to manage now.

I'm happy with the fitment at this point. The welds are a little scraggly, but they aren't bad. Overall, pretty satisfied. A fun way to spend a Sunday afternoon, I certainly enjoyed myself.

Hopefully the pictures show that.


Member
Posts: 12,628
Joined: Oct 7 2008
Gold: 10.00
Mar 23 2014 08:09pm


Go Back To Motor Sports & Cars Topic List
Prev1121314151631Next
Add Reply New Topic New Poll