d2jsp
Log InRegister
d2jsp Forums > Off-Topic > General Chat > User Blogs > Link's Angry Woodworking
Prev123
Add Reply New Topic
Member
Posts: 9,415
Joined: Jul 24 2007
Gold: 212.69
Feb 2 2017 08:23pm
I also used the same planks of wood and fitted them together to make a full back. I hated seeing all the wires through the open back of the previous shelves.


All done (angle 1). I drilled holes on the bottom corner of some of the shelves based on my current setup to allow for wires to pass through.


All done (angle 2)


This post was edited by AngryLink on Feb 2 2017 08:24pm
Member
Posts: 9,415
Joined: Jul 24 2007
Gold: 212.69
Feb 2 2017 08:29pm
This is just to show the sliding doors when they're open. I went out and bought a 1/4 inch veneer plywood with the best grain I could find and went from there.


Final completed picture in the house. There's a lot of junk in the bottom 2 shelves on the left; baskets of stuff and whatnot. Zelda theme ftw. Might also consider making a replacement TV stand but not for some time, if at all.


I'm taking a small break before I start the cat tree which just means I won't be doing anything this weekend except maybe collect the wood. Otherwise, I'm gonna lazy the fuck out with a roaring fire and some video games.

This post was edited by AngryLink on Feb 2 2017 08:31pm
Member
Posts: 9,415
Joined: Jul 24 2007
Gold: 212.69
Feb 27 2017 09:15pm
Hello and welcome back to another edition of Link's Angry Woodworking. I haven't been working as hard or frequent as I have been on the other projects; I'm just getting a little burned out these days. Hopefully I'll still have the desire to make that sun art before long.

I've completed not one, but two of my projects on the list: the cat tree wall thing and the rolling cart for the air compressor tank and nailguns.

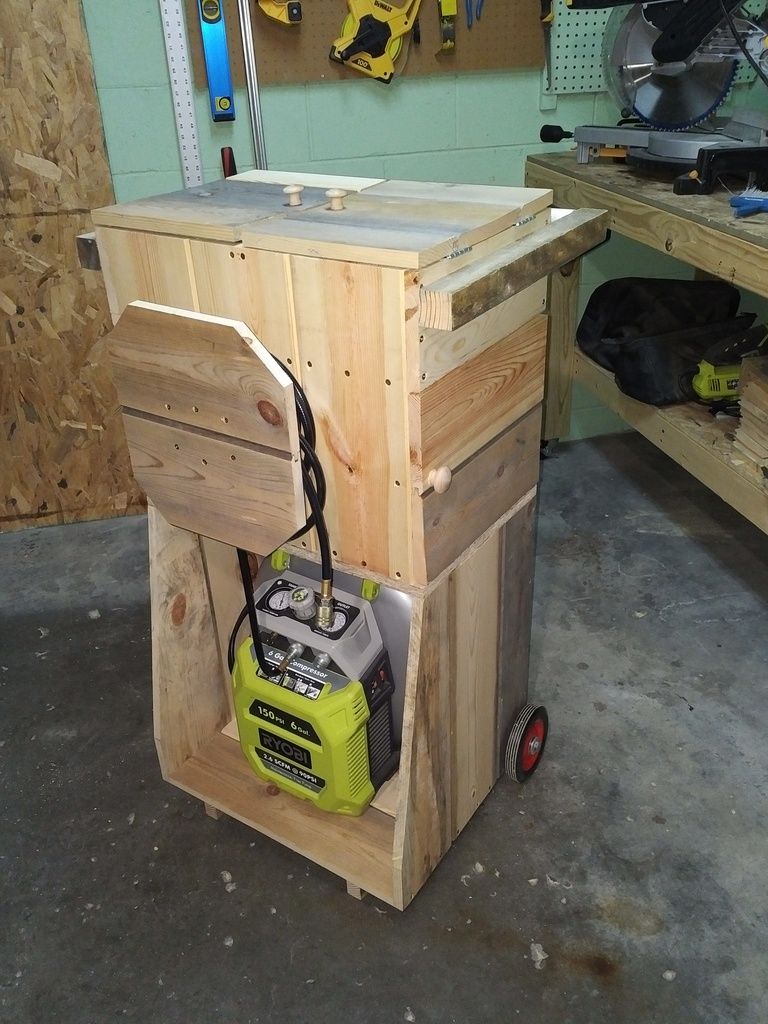
I actually had the majority of the cat wall pieces done and ready to go but then I ordered 2x grommets for the holes cut in the boxes and had to wait a week for the shipping so I decided to throw together the nailgun cart while waiting. It's a pretty rough piece in regards to finish. Minimal to no sanding whatsoever and no staining; this was just a quick job to get over with and I still thought it turned out pretty well and has already served its use over the past few days. I'll probably need to add some more filler for the air hose to wrap around as it's pretty small so the hose wraps in small circles.


Waste not, want not. I used some leftover PVC pipe I had sitting around and fitted it into a handle there and made a permanent fixture to wrap around an extension cord since the tank cord is only about 5 feet long.


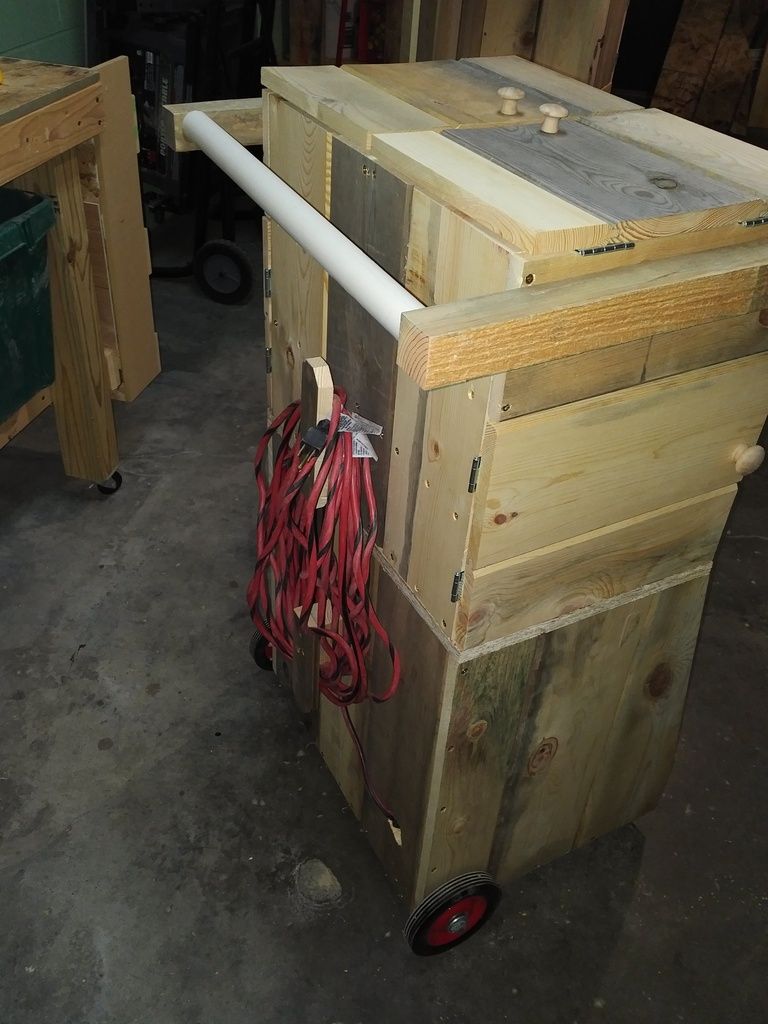
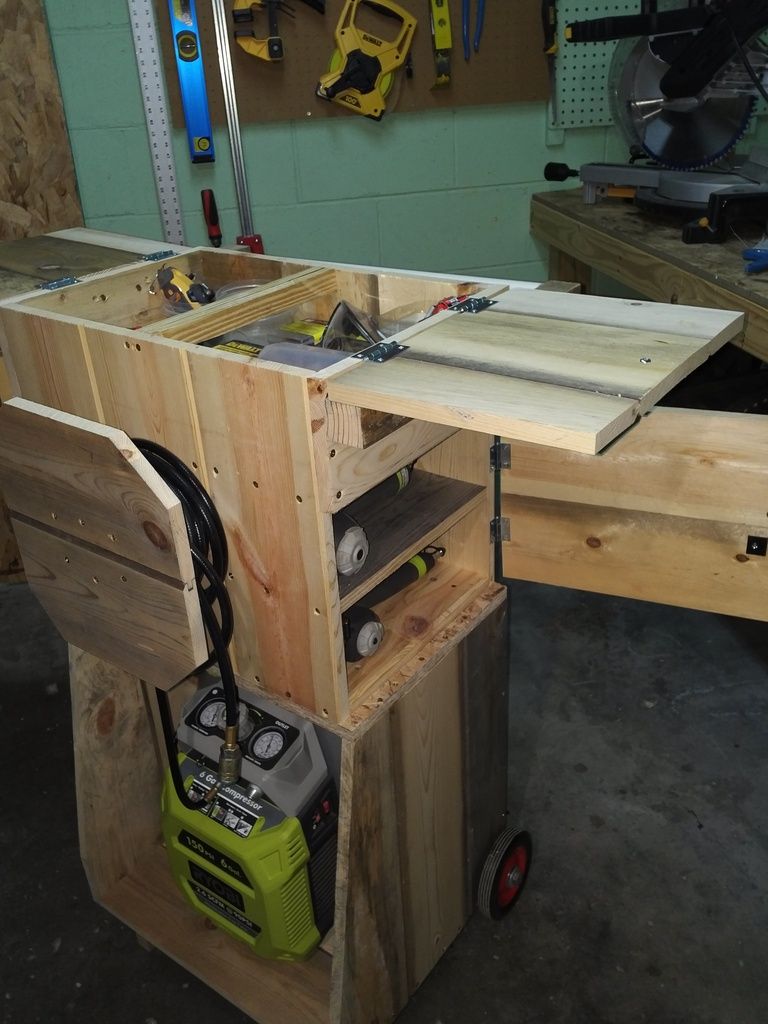
The top half was made to have shelves and storage space for little things. I never did like hanging up the nailguns on the pegboards besides the miter saw since dust would always float up there. Now they'll be nicely tucked away. I probably spent no more than $10 for things like door hinges, magnet door catches and some handles. There's another door that opens up on the other side of the cart as well.


This post was edited by AngryLink on Feb 27 2017 09:17pm
Member
Posts: 9,415
Joined: Jul 24 2007
Gold: 212.69
Feb 27 2017 09:26pm
Now the piece de resistance. It doesn't look as pretty as the one in the inspiration picture but that probably has to do with the quality of the wood used more than anything. I also wasn't ambitious enough to make a box with actual drawers in it so I just made a box with a swinging door and magnet catch. Overall, I was quite satisfied with this project and hope my cats like it. It's not fully completed as I decided to cut out 2x holes per box rather than 1x at the last minute and had to order another couple of grommets for the 2x front holes. You also get to see my 2 cats, hooray for pets. I'll be putting down a blanket on that top shelf there so they can snuggle up there too.


Another angle. Those 3x logs on the sides were just landscaping timber logs and I wrapped them with manila rope so they could serve as scratching posts as well. I thought they added a nice aesthetic to the whole thing. The whole thing is sanded pretty finely but I don't have any intentions of staining any of it.


We'll see how soon I get around to making that sun art. It'll be difficult to make myself drop $50+ on a bunch of random colored stains that I'll probably never use again. Since I have one more spot for a picture, I'll just leave this here.


This post was edited by AngryLink on Feb 27 2017 09:27pm
Member
Posts: 9,415
Joined: Jul 24 2007
Gold: 212.69
May 20 2017 09:39pm
Howdy do jspeons. Took a good long break from building anything or rather, it wasn't as much a break as it was a lack of things/requests to build. Unfortunately, that sun art just hasn't gained any traction yet but still have expectations to build it someday.

My wife's cousin is getting married and wanted to have a rehearsal dinner at the in-law's barn so I was asked to build a high top table. Just like the other 2x tables for the barn, this one is a very simply made table that matches those two and uses the leftover barn wood so it's nothing special.


Our dining table got sent over to the barn as well since we wanted to downsize back to our smaller round table that we had sent into storage but I have a low priority plan to build a similarly sized hexagon table top to put on the same base. No idea when that will be happening though. Fare thee well until the next update!

This post was edited by AngryLink on May 20 2017 09:46pm
Go Back To User Blogs Topic List
Prev123
Add Reply New Topic