Getting To Know Paypal a Little Better: Step 1: Fixing Your Profile:
- Go to the My Account Tab left side of "Send Money" when logged in.
- From Here, you can have a overview look, Add Funds, withdraw, History Resolution Center and help. We will go in further details shortly.
- Please put your mouse
over Profile, clicking it will go to a huge page with more indept options.
- Please double check that your E-Mail, telephone number and street address is correct.
- You have to have either a savings account or checkings account to become a verified user. Which is a must. So Please click on add or edit bank account, then click add.
Step 2: Managing Your Bank Account:
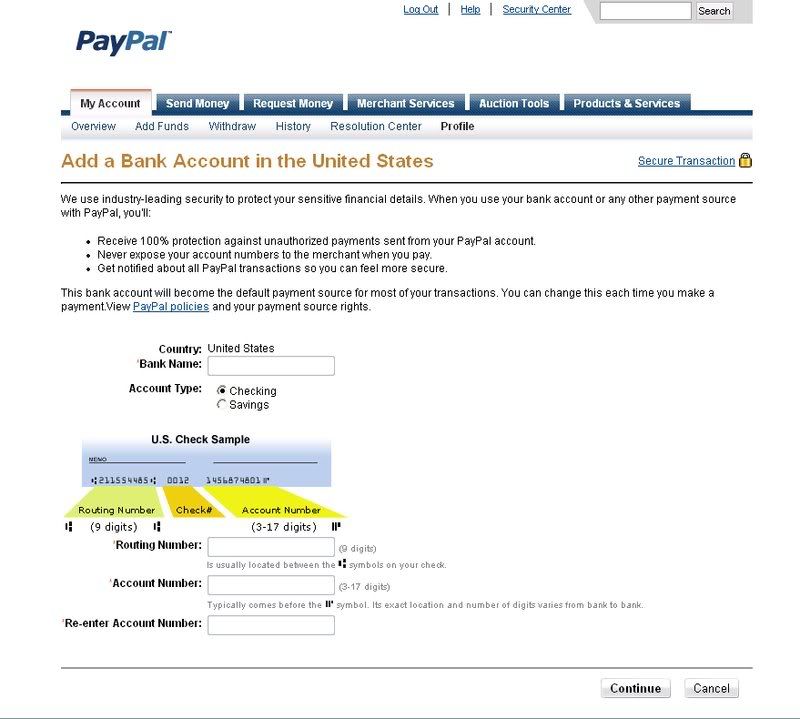
- Pretty easy with the screen shot above, even a checking account would work! If you are unsure of any of your information, please contact your bank, they may have to E-mail your info which -
will usually takes up to 3-5 business days. You can find your info how ever usually on your checks.
- So after you do this, you will then have to verify your banking account so you can begin using it and become a verified paypal user.
- Click on the overview and click on "Verify my banking account" should be next to "Things I have to do"
- Basically what will happen is they will deposit money into that banking account, and you have to type in what they deposit. Very simple, took me 3-5 business days.
- When your all set, with this banking account you can withdraw funds from your banking account to your paypal.
Step 3: Add Credit or Debit Card:
- You can Confirm your Credit card or add one through this step
- You can also use : Debit Cards (also called check cards, ATM cards, or banking cards) are accepted if they have a Visa or MasterCard logo
After that is done, you have completed your profile, and your registration on Paypal.
Thanks for reading this guide and best of luck to your Paypal registration.
I would like to thank ArtofApacolypse for helping setup this guide.
~Kevin